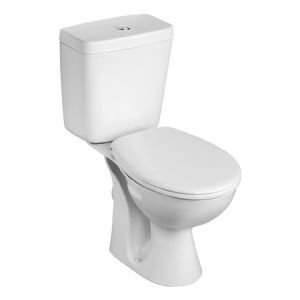
Installation Guide: How To Install A Close-Coupled Toilet
![]()
How to Install a Close-Coupled Toilet
If you’ve never installed a close-coupled toilet yourself before, it can seem like quite a daunting prospect; however, it’s actually a relatively simple job, provided you have the right tools and know-how. In this simple guide, we’ll walk you through the process of installing a toilet the easy way. If you’re thinking about purchasing a toilet but can’t decide which sort is right for your premises, be sure to check out our toilet buyer’s guide.
What you’ll need
Before you begin, ensure that all the parts listed in the manufacturer’s guidelines are present and undamaged. Occasionally, the components can become soiled with dirt and debris during storage; if this is the case, clean them with a soft, dry cloth.
Once you’re satisfied that everything is in order, you’ll need the following tools:
Spirit level
Pencil
Electric drill
Wall plugs
Screwdriver
Silicone sealantInstallation
Now it’s time for the fun part: installation. First, you’ll need to assemble the cistern. This process varies depending on the make and model of toilet, so consult the manufacturer’s instructions carefully. Be sure not to overtighten any screws or washers - hand tightening should be adequate.
1. Before you begin, isolate the water supply. Once you’ve assembled the cistern, lower it carefully onto the toilet pan, making sure that the large, central close-couple washer is in the correct position. Next, install the pan connector onto your waste pipe, then put the toilet next to the waste pipe to ensure that they are correctly aligned. Push the toilet onto the waste, ensuring a snug connection.
2. Now take the spirit level and use it to make sure that the cistern is level. Use a pencil to mark the location of the fixing holes on the wall. Repeat this process with the toilet pan, again marking off the fixing holes in the toilet base, then mark around the edge of the toilet pan where it meets the floor.
3. Remove the toilet from the wall and drill holes through each of the marks before installing appropriate wall plugs. You needn’t install wall plugs in the floor if it’s made of wood. Next, apply silicone sealant around the inner edge of the pencil line you marked around the base of the pan, then carefully put the toilet back in place.
4. Now use a screwdriver to screw the cistern into the wall, then screw the toilet base into the floor. Be sure not to overtighten the screws, as this can cause the toilet to crack. Once the toilet is fixed in place, reconnect the cold water supply and turn it on at the isolation valve to check for leaks.
5. Finally, fix the seat the toilet pan using the bolts provided, then apply a final application of silicone sealant around the base of the toilet before smoothing it off with a damp cloth.
Congratulations! You’ve successfully installed your first toilet. All you have to do now is break it in...
-
Posted by Paul Thorn
2nd October 2018

 UK's Largest Stockholding
 Next Day Delivery Available
 UK Mainland Delivery from £15
 Minimum 1 Year Guarantee